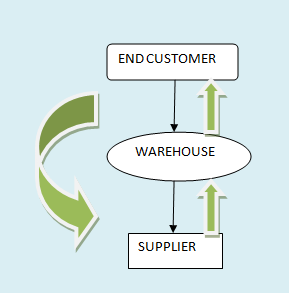
- This order type applies when customer orders a product which you do not stock or manufacture.
- In turn customer places the order, you place the order with supplier and after the shipment from the supplier, and you distribute the product to the customer.
- Below is the flow chart for B2B process flow:
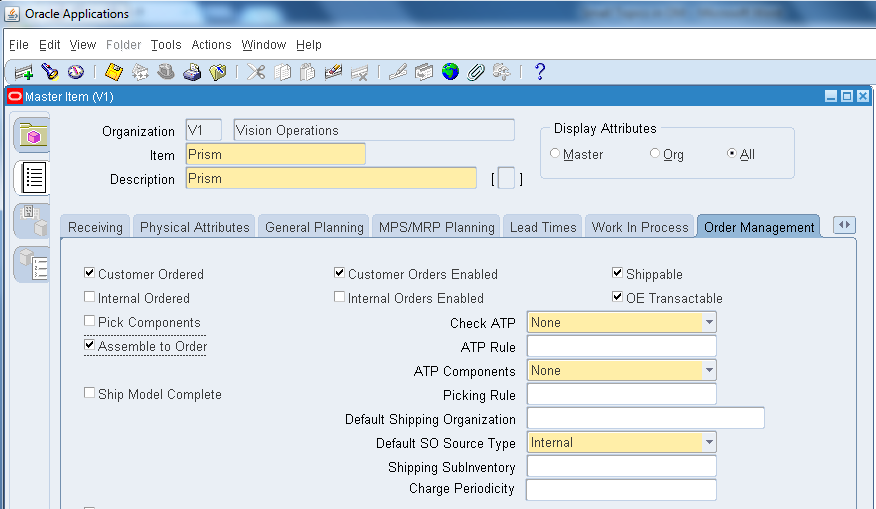
STEP 1: Item Creation for Back 2 Back orders
- Item: Prism
- Copy the Purchasing template.
- Purchasing Tab: List Price : $15, Used Approved Supplier © enable
- General Planning Tab: Source Type : Supplier, Make or Buy : Buy
- Order Management Tab: Assemble to Order © enable.
- Assign to our inventory.


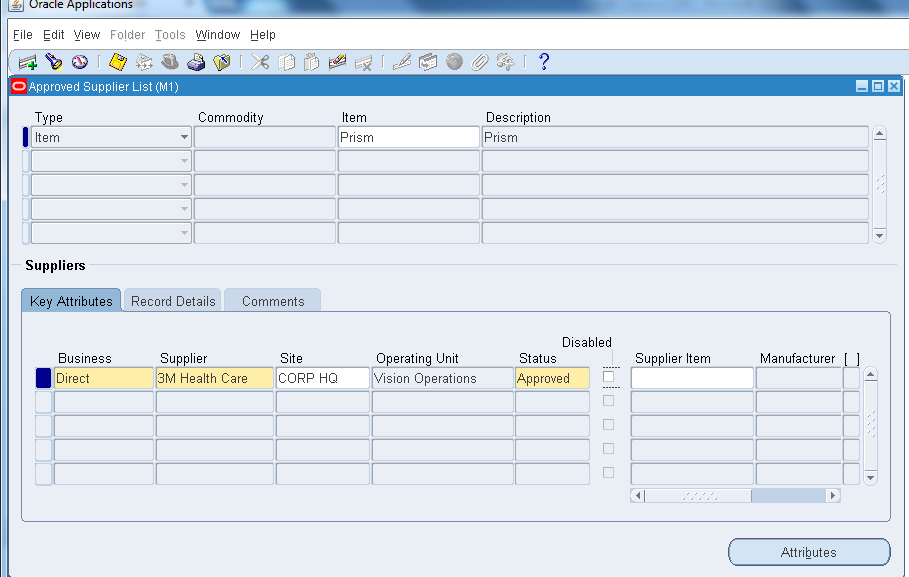
STEP 2: CREATE APPROVED SUPPLIER LIST
Invoking: Order Management →Purchasing→ Supply Base→ Approved Supplier List
- Lets create an Approved supplier List for the item we created (Prism).
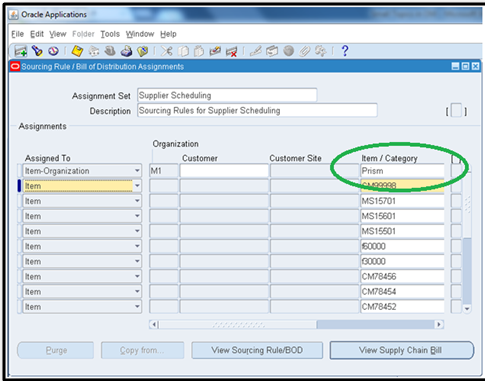
STEP 3: Create Sourcing Rule
Invoking: Order Management →Purchasing→ Supply Base→ Sourcing Rule
- We are going to create Sourcing Rule as: Prism_Sourcing.

Step 4: Assign Sourcing Rule
- Query the ”Supplier Scheduling Assignment” set by using F11 key & paste our item, Sourcing rule as below.

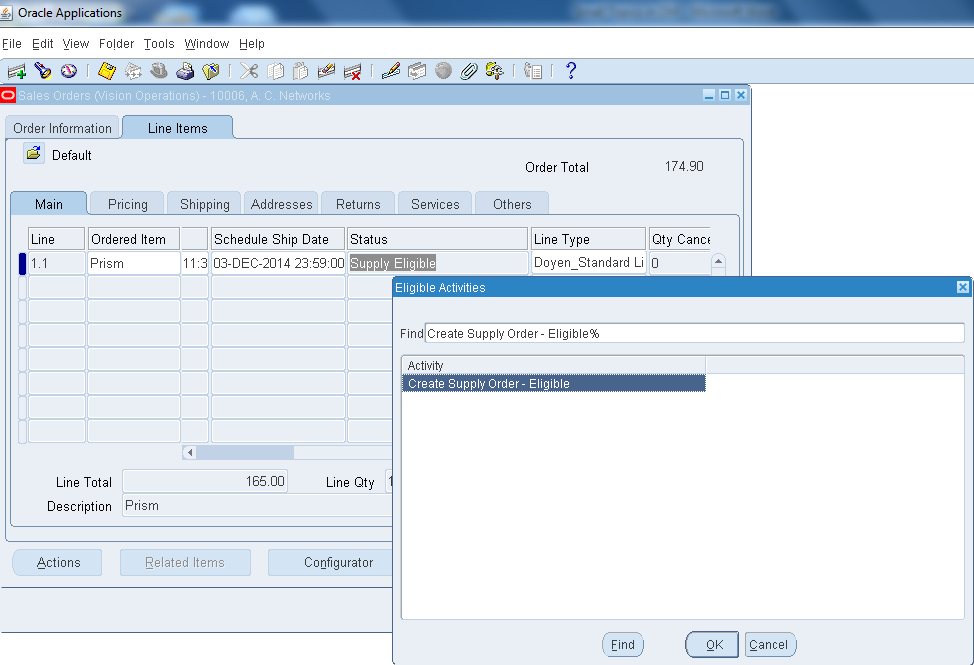
STEP 5: BOOK SALES ORDER
- Now book the sales order and the status of the line will be Supply Eligible.

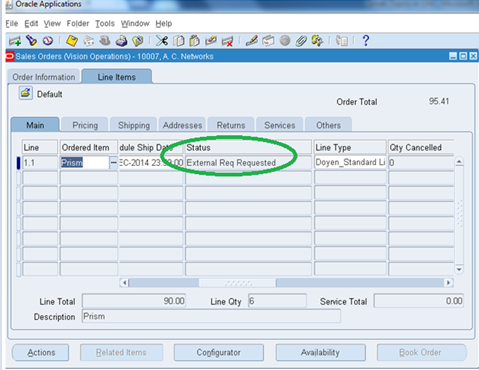
- Select the Supply Eligible text →Right Click→Progress Order→OK
- Now the status will be changed to External Req Requested as below.
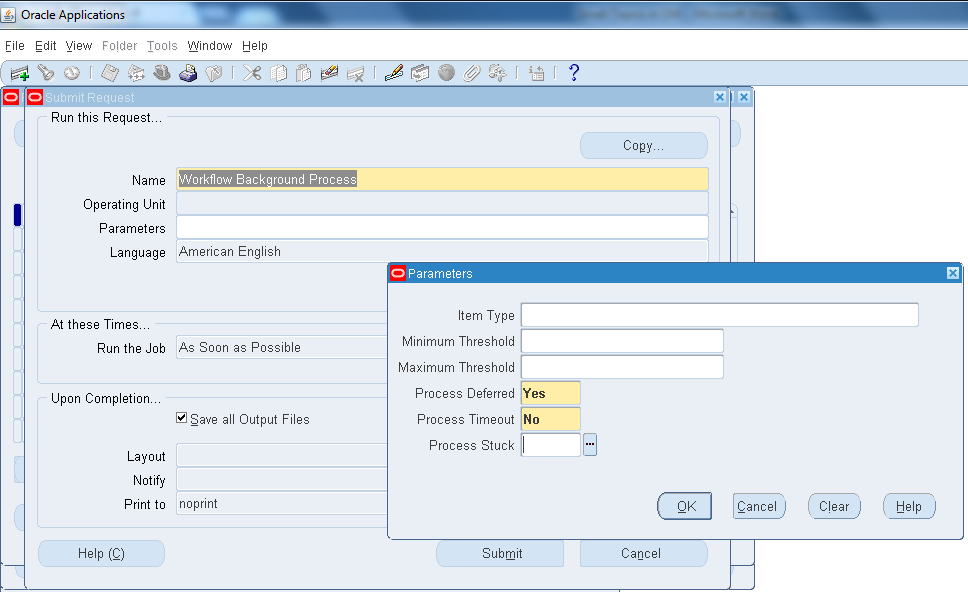
- Now run the Workflow Background Process from View→ Request
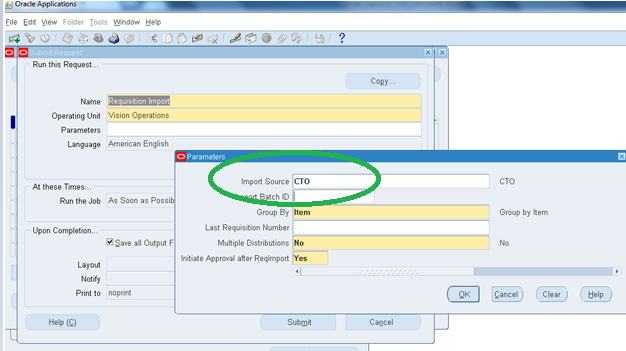
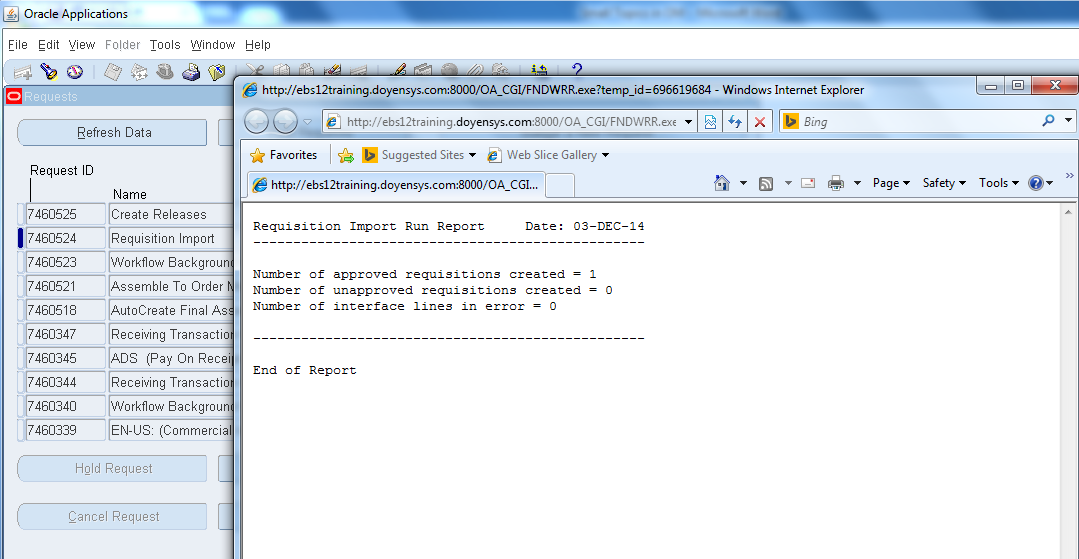
STEP 6: Requisition Import
- Switch the responsibility to Purchasing and Run Requisition Import from View→ Request
- Select Import Source as CTO.
- Here Requisition Import and Create Releases Program runs and view the output, so that we can make sure that the releases has been processed successfully as below.
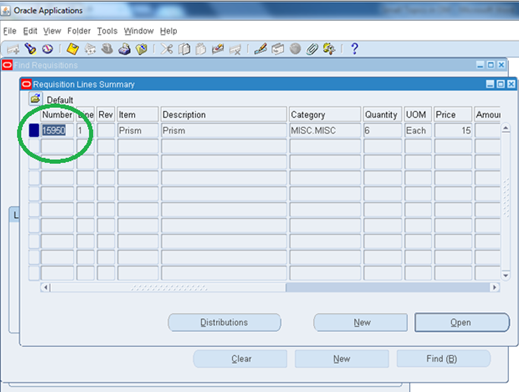
STEP 7: QUERY REQUISITION
Invoking: Purchasing→Requsitions→ Requisitions Summary
- Now query by the item: Prism (we created) and create the REQ as below.

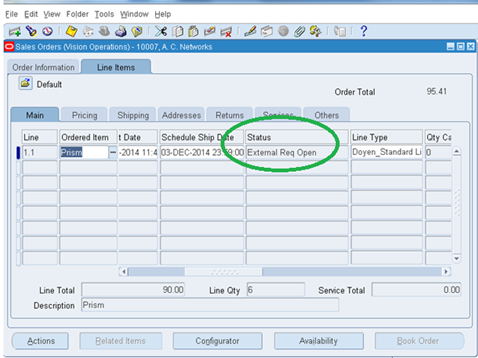
- Now if you check the sales order line status it will be External Req Open.
STEP8: AUTOCREATE PURCHASE ORDER
Invoking: Purchasing→Purchase Order→ Purchase Order Summary
- Now let’s create a purchase order with the req # we created.


- Now if you check the status of the sales order after creating PO, it will be PO Open.

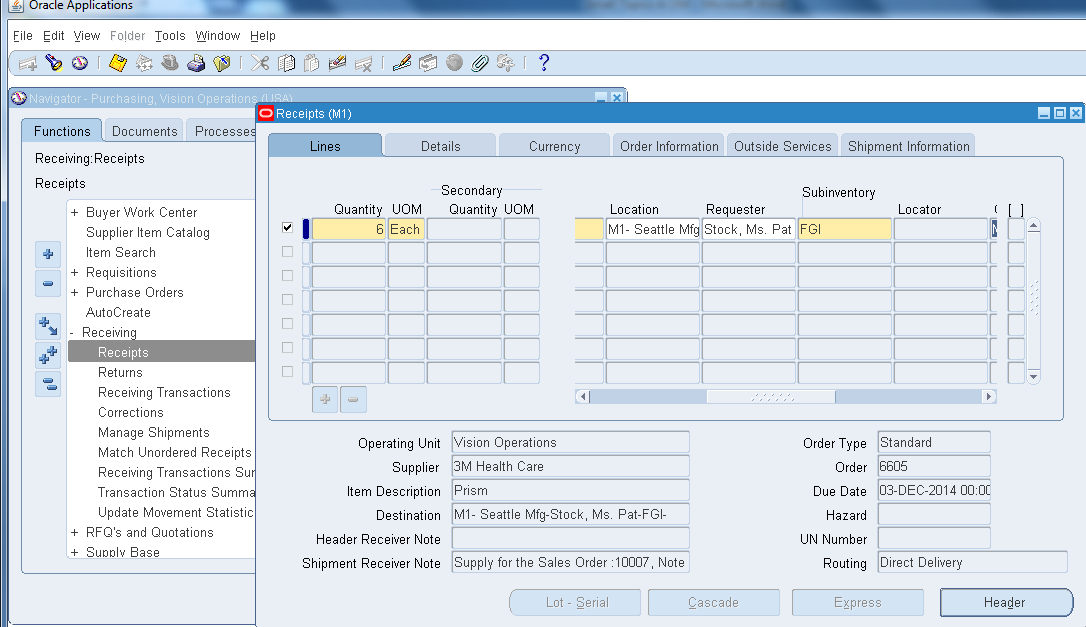
STEP 9: Taking Receipt
Invoking: Purchasing→ Receiving → Receipts

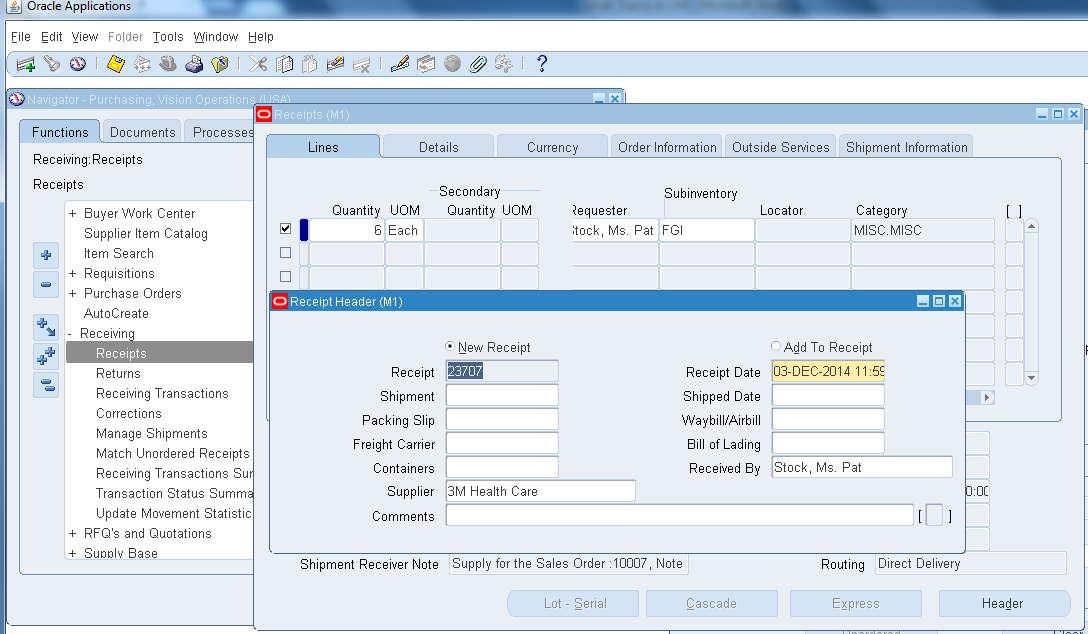
- Corresponding order # created:
Sales Order
|
10007
|
Requisition
|
15950
|
PO
|
6605
|
Receipt
|
23707
|

- Here we took the receipt for the PO created and moved to the Sub Inventory FGI and status will be changed to Awaiting Shipment as above.
- From here we can do normal Pick up release transaction in order to ship the order from inventory to Customer.
Invoking: Order Management→ Shipping→ Release Sales Order

Invoking: Order Management→ Shipping→ Transactions
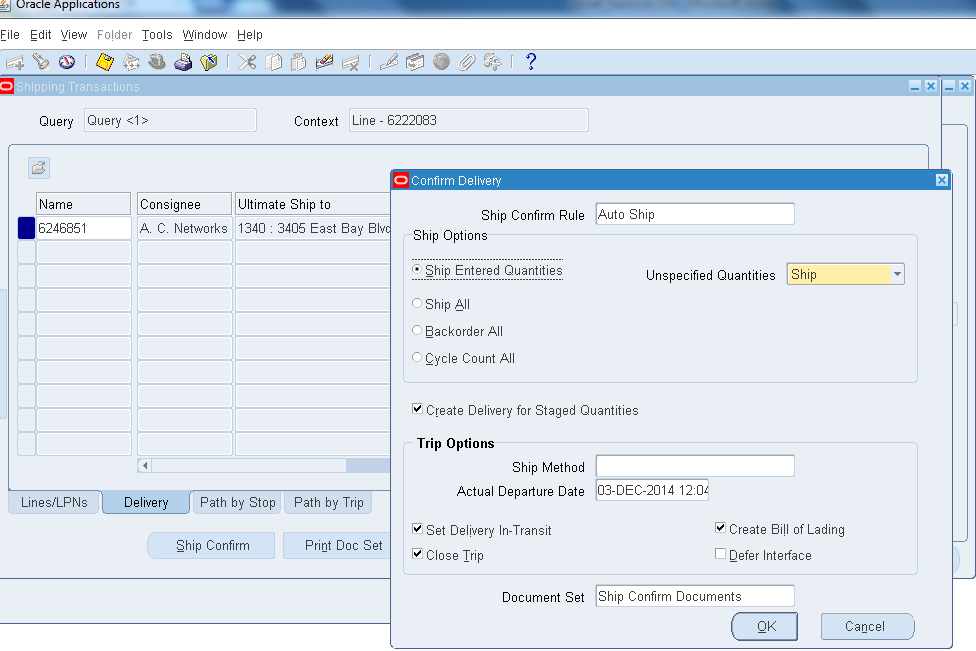
- Running Workflow background Process.
- Final status of order closed, which means the order has been shipped to the customer.
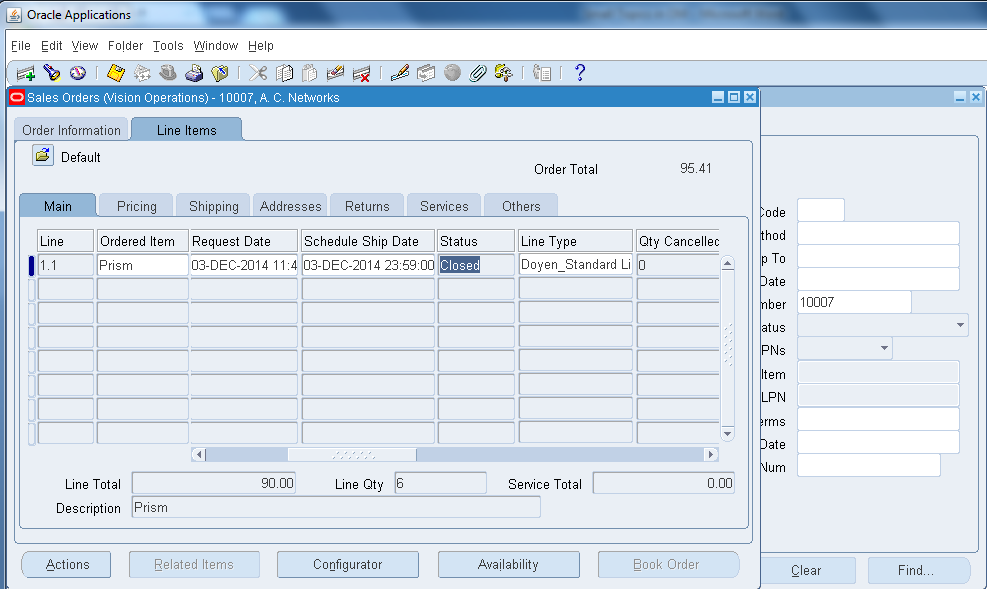
- This completes the Back 2 Back order flow.
No comments:
Post a Comment