Purpose
This tutorial shows how to install Oracle WebLogic Server 12c and create a new WebLogic Server domain.
Time to Complete
Approximately 1 hour
Overview
This tutorial covers installing Oracle WebLogic Server 12c (12.1.1) on a Linux system by using the Linux binary installer. After WebLogic Server is installed, the tutorial shows how to use the Configuration Wizard to create a new WebLogic Server domain.
Software Requirements
The following is a list of software requirements:
- Oracle Linux 5.6+
Prerequisites
Before starting this tutorial, you should have downloaded the Oracle WebLogic Server 12c (12.1.1) binary installer to your Linux machine.
Installing WebLogic Server
To install Oracle WebLogic Server 12c, perform the following steps:
| 1. | In a Terminal window, navigate to the location of the Linux binary installer (in this tutorial the stage directory), and enter the following command to run it: $ ./oepe-indigo-installer-12.1.1.0.0.201112072225-12.1.1-linux32.bin Note: The name of the installer you downloaded may be different. Also note that, if you are using a different installer, the name of the installer in the title bar of all the installation screens will differ from the screens in this tutorial.  |
|---|---|
| 2. | On the Welcome screen of the installer, click Next. |
| 3. | On the Chose Middleware Home Directory screen, select Create a new Middleware Home. Then enter the name of the middleware home directory. In this tutorial it is: /u01/app/oracle/Middleware. Then click Next.  You may decide to chose a different directory for <MIDDLEWARE_HOME>. |
| 4. | On the Register for Security Updates screen, deselect I wish to receive security updates via My Oracle Support. When the dialog box titled "Are you sure?" appears, click Yes. Then click Next.  |
| 5. | On the Choose Install Type screen, select Custom. Then click Next.  |
| 6. | On the Choose Products and Components screen, select Server Examples and Coherence Examples so that all possibilities are now selected. Then click Next.  Note: The installer you are using may not have the same products as those seen in the tutorial. The only required product for these tutorials is WebLogic Server itself, so it won't matter if Oracle Coherence or Oracle Enterprise Pack for Eclipse are not installed. |
| 7. | On the JDK Selection screen, select the JDKs to install. In this tutorial there is just one, SUN SDK 1.6.0_29. If your installer lists multiple JDKS, select them all. Then click Next.  |
| 8. | On the Choose Product Installation Directories screen, leave all the default installation directories. Make note of where the products are being installed. Then click Next.  Note: Again, the installer you are using may not have the same products as those seen in the tutorial, so there may be fewer installation directories listed. |
| 9. | On the Installation Summary screen, click Next. |
| 10. | On the next screen, a progress bar is displayed. |
| 11. | When the progess bar reaches 100%, the Installation Complete screen is displayed. Deselect Run Quickstart. Then click Done.  The installation of Oracle WebLogic Server 12c (12.1.1) is now complete. |
Creating a New WebLogic Server Domain
A domain is the basic administration unit for Oracle WebLogic Server. It consists of one or more Oracle WebLogic Server instances and logically related resources and services that are managed collectively. A domain must contain one administration server. It may contain any number of managed servers. For failover, managed servers may be placed in a cluster.
To create a new WebLogic Server Domain, perform the following steps:
| 1. | In a Terminal window, navigate to <MIDDLEWARE_HOME>/wlserver_12.1/common/bin. In this tutorial <MIDDLEWARE_HOME> is /u01/app/oracle/Middleware. Then enter this command to run the configuration wizard: $ ./config.sh  |
|---|---|
| 2. | On the Welcome screen of the Configuration Wizard, select Create a new WebLogic domain. Then click Next.  |
| 3. | On the Select Domain Source screen, select Generate a domain configured automatically to support the following products. The choice Basic WebLogic Server Domain is already selected. That is the only one required, so click Next.  |
| 4. | On the Specify Domain Name and Location screen, enter a Domain name and a Domain location. In this tutorial the domain name entered is dizzyworld. The domain location is left at the default of/u01/app/oracle/Middleware/user_projects/domains. Then click Next. Note: You are free to choose a different name and location for the domain. A domain is not required to be placed under <MIDDLEWARE_HOME>.  |
| 5. | On the Configure Administrator User Name and Password screen, enter a Name and a password twice in theUser password and Confirm user password fields. The Description is optional. Then click Next. In the tutorial the username is weblogic and the password is Welcome1. You can pick other values, if you wish. IMPORTANT: Do not forget this username and password. These are required to do anything with the domain, from starting servers to changing the domain configuration.  |
| 6. | On the Configure Server Start Mode and JDK screen, under the WebLogic Domain Startup Mode, select theProduction Mode option. Select Available JDKs and under it select the Sun JDK. In this tutorial it is the only JDK listed and it is already selected. Then click Next.  |
| 7. | On the Select Optional Configuration screen, select Administration Server and Managed Servers, Clusters and Machines. Then click Next. 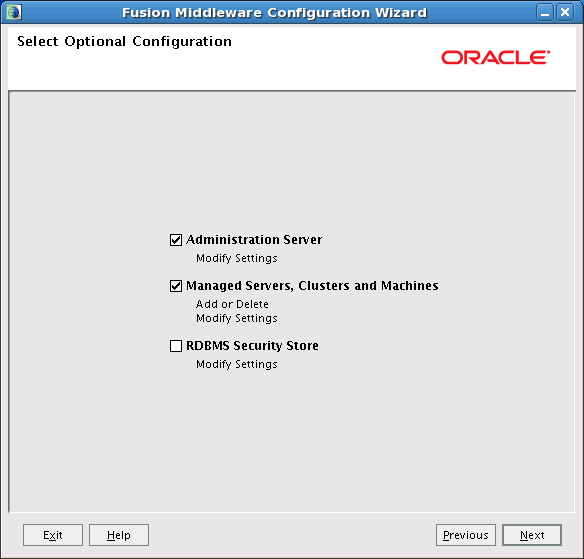 |
| 8. | On the Configure the Administration Server screen, leave the default values for Name and Listen address. In this tutorial the Listen port is changed to 8001 because another program on the machine is already using the default port of 7001. Leave SSL enabled deselected. Then click Next. 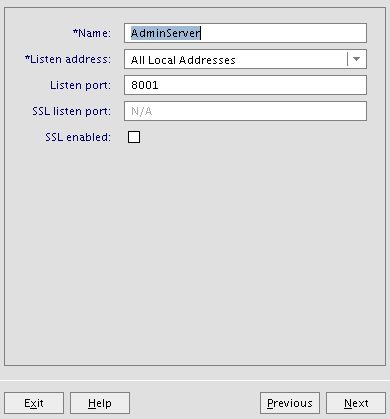 |
| 9. | On the Configure Managed Servers screen, click the Add button. |
| 10. | When a row appears in the table, enter dizzy1 for the managed server Name. Leave Listen address at the default of All Local Addresses. Change the Listen port to 8003. Leave SSL enabled deselected. |
| 11. | Click the Add button again. In the new row, enter dizzy2 for the managed server Name. Leave Listen address at the default of All Local Addresses. Change the Listen port to 8005. Leave SSL enabled deselected. Then click Next. 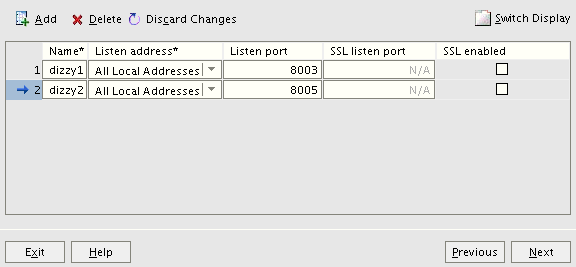 |
| 12. | On the Configure Clusters screen, just click Next.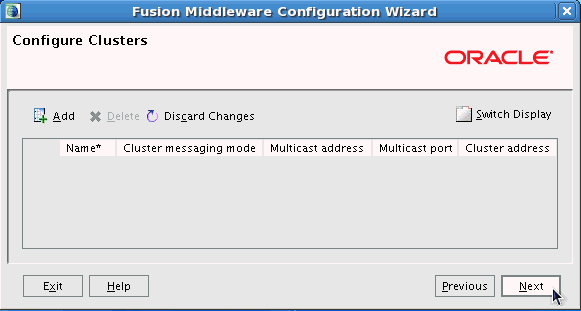 |
| 13. | On the Configure Machines screen, just click Next. |
| 14. | On the Configuration Summary screen, click Create. |
| 15. | On the Creating Domain screen, after the progress bar reaches 100%, click Done. A WebLogic Server domain has now been created. |
| 16. | To view the directory structure and files for the newly created domain, enter the following commands in a Terminal window: $ cd /u01/app/oracle/Middleware/user_projects/domains/dizzyworld $ ls Note: If you placed the domain in a different location, cd to that directory instead.  |
| 17. | To start the administration server of the domain, from the domain directory, enter the command: $ ./startWebLogic.sh  |
| 18. | As the script runs it will prompt you for a username and password. Use the administrator username and password entered when the domain was created. Note: The password will not be displayed.  |
| 19. | As the script continues to run, look for the <Notice>: The server started in RUNNING mode. That message means the administration server is up and running.  Note: If any warnings are displayed in the Terminal window, they can be ignored. |
| 20. | To access the WebLogic Server administration console, open a web browser and enter the URL:http://hostname:port/console In this tutorial, that is: http://localhost:8001/console Note: If you used a different port number for the administration server, use that port instead. You can also use the host name, rather than localhost. In this tutorial, the host name is: host01.example.com On the Welcome screen, log in using the Username and Password entered to start the administration server. 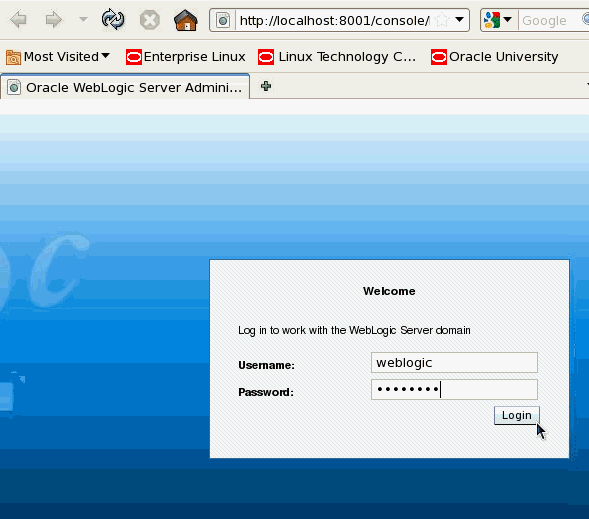 |
| 21. | The home page of the administration console is displayed. |
virtualnuggets offering oracle dba online training,corporate training services.
ReplyDeleteHow to enable the archive log mode.
To see if it’s enabled or not?
Archive log list;
If it’s not enabled we need to take our database into mount stage.
Sql>shutdown immediate;
Sql>startup mount;
Sql>alter database archivelog;
To disable archive log:
Sql>alter database noarchivelog; (this is for knowledge don’t do it)
To set destination for archivelogs:
Sql>alter system set log_archive_dest_1=’LOCATION=/path/arch/’ scope=both;
Sql>alter database open;
Sql>archive log list;
Simply wish to say your article is as astonishing. The clarity in your post is simply great, and I could assume you are an expert on this subject. Same as your blog i found another one Oracle WebLogic .Actually I was looking for the same information on internet for Oracle WebLogic and came across your blog. I am impressed by the information that you have on this blog. Thanks a million and please keep up the gratifying work.
ReplyDelete