Responsibility – Cash Management Super User
Navigation – Setup – Banks – Banks

Clicking on this opens an OAF page

Click on Create – opens the following.

Enter the necessary details required and click Save and Next.

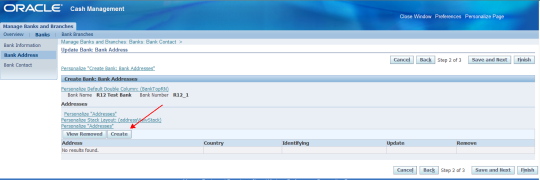
Update the Bank Addresses by clicking on Create

Enter the information and click on Finish

Click on Save and Next

Click on Create Contact .
Enter the necessary information required.


Click Apply once the details are entered.

Click on Finish. The bank details are here in this screen.

Bank is Created Successfully. Now we will see how to create a Branch underneath the Bank which we just Created.
Click on Create Branch icon

Click on Continue from the below screen

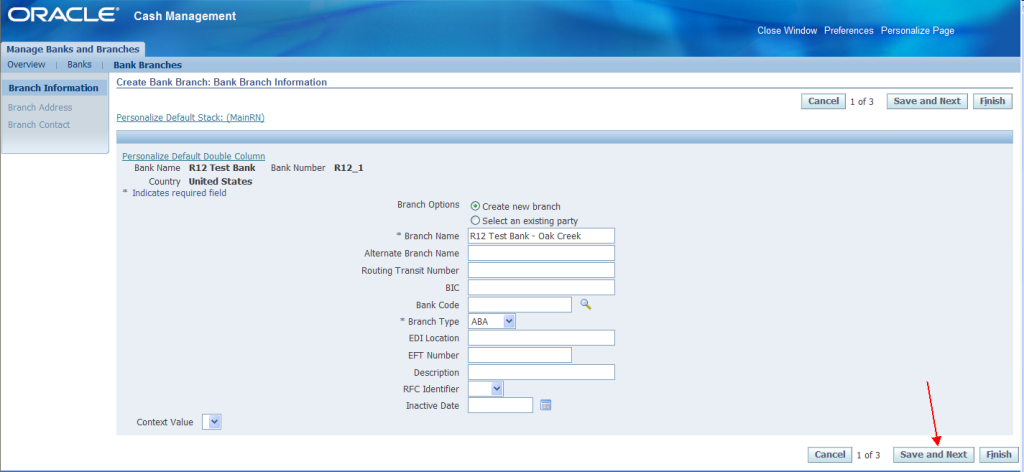
In the below screen enter the Branch Details as shown

Click Save and Next.

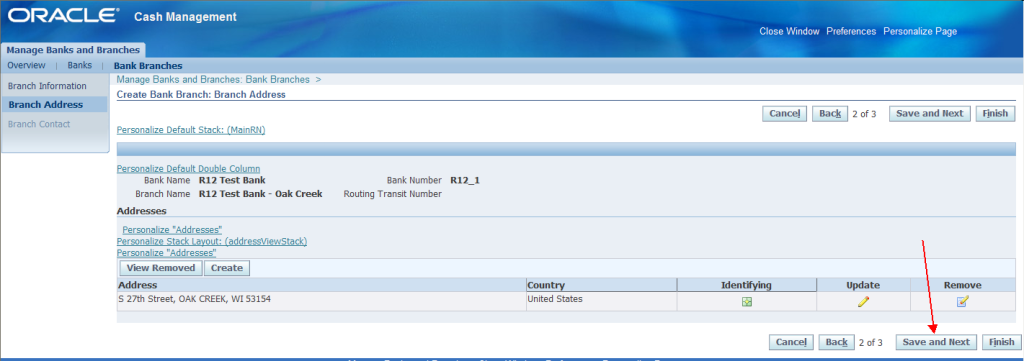
Click on Create button in the above screen to add the Branch’s address

Enter the address and then click Apply.

Click Save and Next

Click on Create Contact button to add the Contact Details


Click on Apply

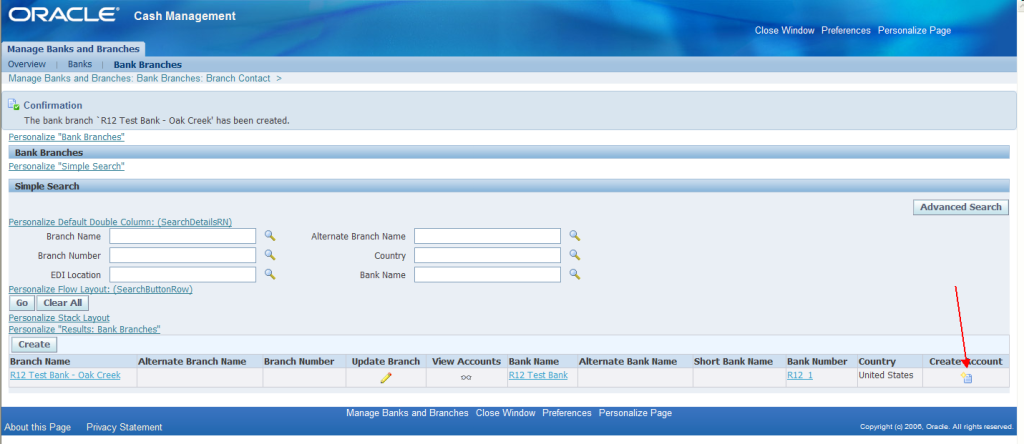
Click on Finish.

To Create Account – click on the Icon below…

Click on Create button from the below screen

Enter the details in the screen below

Click on Continue

Enter the necessary details in the screen above

Click on Next

Click on Save and Next
Navigation – Setup – Banks – Banks

Clicking on this opens an OAF page

Click on Create – opens the following.

Enter the necessary details required and click Save and Next.

Update the Bank Addresses by clicking on Create

Enter the information and click on Finish

Click on Save and Next

Click on Create Contact .
Enter the necessary information required.


Click Apply once the details are entered.

Click on Finish. The bank details are here in this screen.

Bank is Created Successfully. Now we will see how to create a Branch underneath the Bank which we just Created.
Click on Create Branch icon

Click on Continue from the below screen

In the below screen enter the Branch Details as shown

Click Save and Next.

Click on Create button in the above screen to add the Branch’s address

Enter the address and then click Apply.

Click Save and Next

Click on Create Contact button to add the Contact Details


Click on Apply

Click on Finish.

To Create Account – click on the Icon below…

Click on Create button from the below screen

Enter the details in the screen below

Click on Continue

Enter the necessary details in the screen above

Click on Next

Click on Save and Next
No comments:
Post a Comment