SCHEMA NAME : XXERP
TOP NAME : XXERP_TOP
Application : XXERP Custom Application
Data Group : Standard
Request Group : XXERP Request Group
Menu : XXERP_CUSTOM_MENU
Responsibility : XXERP Custom
Step-1
Create a Tablespace in the backened Database for custom schema.
create tablespace XXERP datafile ‘/d01/oracle/PROD/db/apps_st/data/XXERP01.dbf’
size 50M;
Step-2
Create Schema
create user XXERP identified by XXERP default tablespace XXERP temporary tablespace temp quota unlimited on XXERP;
Step-3
Grants Connect and Resource to schema
grant connect, resource to XXERP;
Step-4
Make the directory structure for your custom application files.
cd $APPL_TOP
mkdir XXERP
mkdir -p XXERP/12.0.0
mkdir -p XXERP/12.0.0/admin
mkdir -p XXERP/12.0.0/admin/sql
mkdir -p XXERP/12.0.0/admin/odf
mkdir -p XXERP/12.0.0/sql
mkdir -p XXERP/12.0.0/bin
mkdir -p XXERP/12.0.0/reports
mkdir -p XXERP/12.0.0/reports/US
mkdir -p XXERP/12.0.0/forms
mkdir -p XXERP/12.0.0/forms/US
mkdir -p XXERP/12.0.0/lib
mkdir -p XXERP/12.0.0/out
mkdir -p XXERP/12.0.0/log
Step-5
Create Custom Environment file in APPL_TOP directory

Step-6
Edit customPROD_idba22.env file

export XXERP_TOP=/d01/oracle/PROD/apps/apps_st/appl/XXERP/12.0.0
Step-7


go to last line and add
XXERP_TOP=/d01/oracle/PROD/apps/apps_st/appl/XXERP/12.0.0

Step-8
Register your Oracle Schema.
Login to Applications with System Administrator responsibility
Navigate to Application–>Register
Application = XXERP Custom Application
Short Name = XXERP
Basepath = XXERP_TOP
Description = XXERP Custom Application

Step-9
Register Oracle User
Naviate to Security–>Oracle–>Register
Database User Name = XXERP
Password = XXERP
Privilege = Enabled
Install Group = 0
Description = XXERP Custom Application User

Step-10
Add Application to a Data Group
Navigate to Security–>Oracle–>DataGroup

Step-11
Create custom request group
This will act as a placeholder for any custom reports we wish to make available for the
Custom Responsibility (which is defined at a later stage)
Navigate to Security–>responsibility–>Request
Group = XXERP Request Group
Application = XXERP Custom
Code = XXERP
Description = XXERP Custom Requests
We will not define any requests to add to the group at this stage, but you can add some now if required.

Step-12
Create custom menu
This will act as a placeholder for any menu items we wish to make available for the
Custom Responsibility (which is defined at a later stage). We will create two menus, one
for Core Applications and one for Self Service.
Navigate to Application–>Menu
Menu = XXERP_CUSTOM_MENU
User Menu Name = XXERP Custom Application
Menu Type =
Description = XXERP Custom Application Menu
Seq = 100
Prompt = View Requests
Submenu =
Function = View All Concurrent Requests
Description = View Requests
Seq = 110
Prompt = Run Requests
Submenu =
Function = Requests: Submit
Description = Submit Requests

Step-13
Create new responsibility. Navigate to Security–>Responsibility–>Define
Responsibility Name = XXERP Custom
Application = XXERP Custom
Responsibility Key = XXERPCUSTOM
Description = XXERP Custom Responsibility
Available From = Oracle Applications
Data Group Name = XXERPGroup
Data Group Application = XXERP Custom
Menu = XXERP Custom Application
Request Group Name = XXERP Request Group

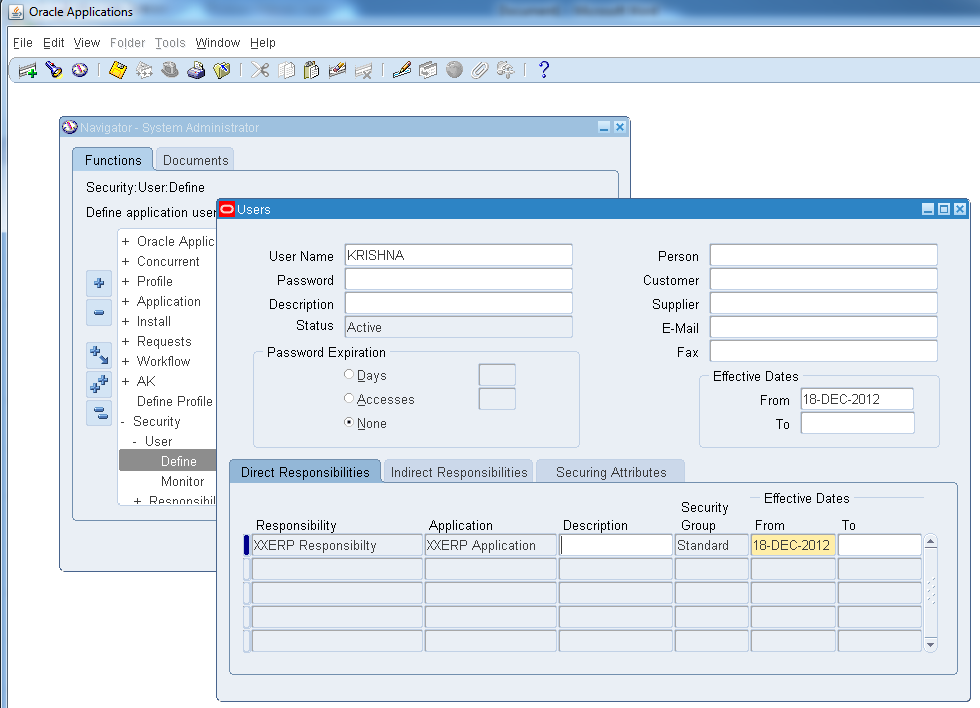
Step-14
Add responsibility to user
Navigate to Security–>User–>Define
Add XXERP Custom responsibility to users as required.
Step-15
As we have edited default.env we need to bounce the opmn.
cd $ADMIN_SCRIPTS_HOME
sh adopmnctl.sh stopall
Rest the Application ENvironment and start OPMN
sh adopmnctl.sh startall

Well explained step by step tutoriel. many thanks
ReplyDelete